
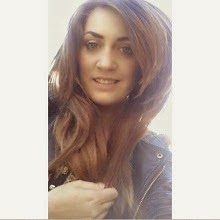
Hey Dolls!
As I said the other day I'm going to be doing a tutorial using the Revlon Decadent Quad. I teamed it with MAC Angel because I absolutely LOVE this lipstick! It is one of my all time favourite lip colours! This is also my 'go to winter makeup'.
So... On with the tutorial!
Always start with a clean face. Moisturise and clean your skin before starting any makeup look!

I have recently fell in love with the Revlon ColorStay I use it in Natural Beige It has amazing coverage (light to medium) and is very easily buildable. I also don't need to powder with this as it has quite a Matte finish.
I apply this all over my face in little dots with my fingers and the go back in and buff it all out with a Real Techniques Buffing Brush, I do have to work fairly quickly with this foundation as it sets quickly.

I then move onto my brows (finally got a new brow pencil!). Using the Rimmel Eyebrow Pencil in Dark Brown with little flicking motions I fill in the gaps in my brows and also try to add a little arch as my don't naturally have one.
I then go back in using any small angled brush it can either be clean or with a bit of a matte Brown eyeshadow and blend it all in so they don't look so drawn on and sharp. It makes a huge difference!

On my eyes I firstly use MAC Retrospec (left of the MAC palette) all over the lid on a Flat Eyeshadow Brush concentrating on the tear duct area.
I then take the Brown and Gold colors from the Revlon Decadent Quad on a Real Techniques Base Shadow Brush and put this into my crease using a window wiper motion.
Now, using any Small Blending Brush blend all the harsh lines out.
Using a Small Angled Brush (sorry just realised you can't see the angled brush in this photo, I'm using the Elf Small Angled Brush) take the Dark Brown under the eye and add any brown eyeliner to the water line and tide line. I just used my eyebrow pencil.
Using any brush you find easiest use the lightest Pink shade and add it to the brow bone.

Now using the Rimmel Exaggerate Liquid Eyeliner and add a small wing.

I have also found an old mascara I forgot I had and fell in love with it all over again. MaxFactor False Lash Effect. It gives such a lovely effect to the lashes!
Curl the lashes and add this mascara.

Using Rimmel Wake Me Up concealer, conceal under the eyes and
also use it as a high lighter down the bridge of the nose, the forehead, cupids bow and chin. I blended all this with my fingers. Now cover any blemishes and use the Real Techniques Deluxe Crease Brush to blend all the concealer in.

As I'm so pale lately I NEED to bronze up my skin. I should just stop being lazy and fake tan but it takes so long! I may start experimenting with fake tan... Anyway!
Bronze under the cheek bones, temples, forehead and jawline using Bourjois Bronzing Powder on a Avon Face Brush.

Now my favourite part... Lips!!
I lined my lips with Rimmel Eastend Snob taking it onto my lips a bit as a base and then put my favourite lipstick MAC Angel on top. You can add a clear gloss if you like but I personally like it without.


Now you're done!!
I hope you enjoyed this tutorial!
As I was saying during the tutorial, I may start experimenting with self tanners. If you have any you think I should try or want me to test out for you, let me know in the comments.
Either Monday or Tuesday next week I'm going to be doing a Classic Red Lip makeup look!
Let me know what you think of my Blog! Thanks for reading guys!
Loves xo
No comments:
Post a Comment